Ở bài 5, mình đã nói đến Custom detection rules với KQL – viết query để phát hiện thứ mà built-in rules chưa bắt được.
Bài này mình sẽ đi sâu hơn vào KQL và Advanced Hunting – không phải dạy ngôn ngữ từ đầu, mà tập trung vào những query thực chiến bạn có thể dùng ngay trong môi trường thật.
Điểm khác biệt giữa SOC analyst giỏi và bình thường không phải là biết dùng Defender hay không – mà là khả năng chủ động đi tìm threat thay vì chỉ ngồi chờ alert. Kỹ năng đó gọi là threat hunting, và KQL là công cụ để làm điều đó.
Alert-driven vs hypothesis-driven
Có 2 cách tiếp cận bảo mật:
Alert-driven (reactive): Đợi alert xuất hiện → điều tra → xử lý. Cách này phổ biến và cần thiết, nhưng có giới hạn: rule tự động chỉ phát hiện những gì đã biết trước.
Hypothesis-driven (proactive): Đặt câu hỏi trước – “liệu trong tenant của mình có user nào đang bị compromise mà chưa có alert?” – rồi viết query để tìm câu trả lời.
Advanced Hunting cho phép bạn làm cả hai: vừa điều tra incident đang có, vừa chủ động hunting threat chưa bị phát hiện.
KQL là gì và học mất bao lâu
KQL (Kusto Query Language) là ngôn ngữ query của Microsoft, dùng trong Defender XDR, Microsoft Sentinel, Azure Monitor, và Log Analytics.
Tin vui: KQL đọc từ trái sang phải, mỗi dòng là một bước xử lý dữ liệu. Không cần biết SQL hay programming để bắt đầu. 5 operator cơ bản là đủ để viết 80% queries thực tế.
Tin buồn: để viết query phức tạp (join nhiều bảng, statistical analysis) cần thời gian luyện tập. Bài này sẽ đi từ đơn giản đến phức tạp dần.
Điều kiện cần
| Yêu cầu | Chi tiết |
|---|---|
| License | Microsoft 365 E5, hoặc Microsoft Defender XDR standalone |
| Quyền truy cập | Security Reader trở lên |
| Dữ liệu | Defender for Endpoint, Office 365, Identity, Cloud Apps đã kết nối (bài 5) |
| Retention | Data mặc định lưu 30 ngày; E5 có thể tăng lên 180 ngày |
Bước 1: Làm quen với Advanced Hunting interface
- Vào Defender portal → Hunting → Advanced hunting
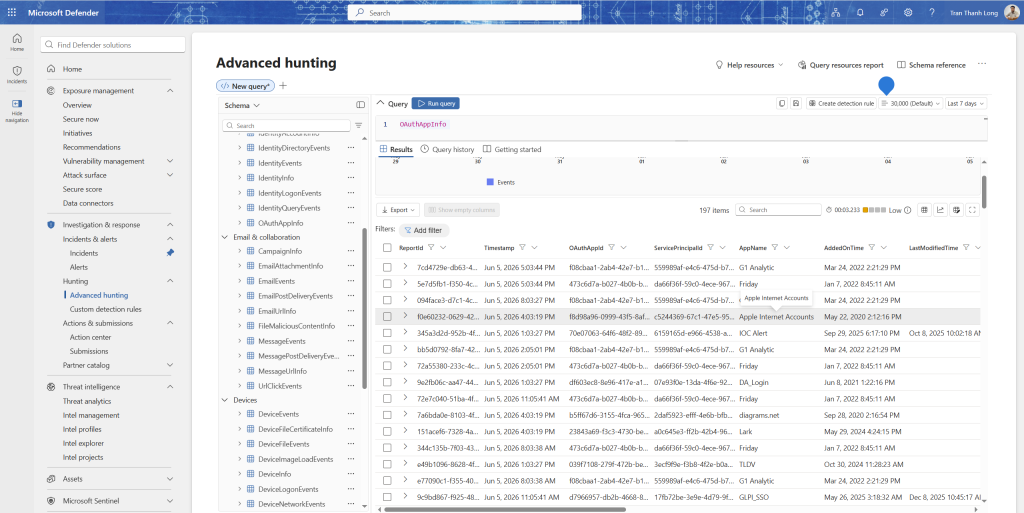
Interface gồm 3 phần:
- Query editor (trái): nơi viết KQL
- Results (dưới): kết quả dạng bảng, có thể export
- Schema explorer (phải): danh sách tất cả bảng và columns có thể query
Một số phím tắt hữu ích:
Shift + Enter: chạy queryCtrl + Space: autocomplete tên bảng, column, functionCtrl + /: comment/uncomment dòng đang chọn
Chạy query đầu tiên – kiểm tra có dữ liệu không
DeviceEvents
| take 10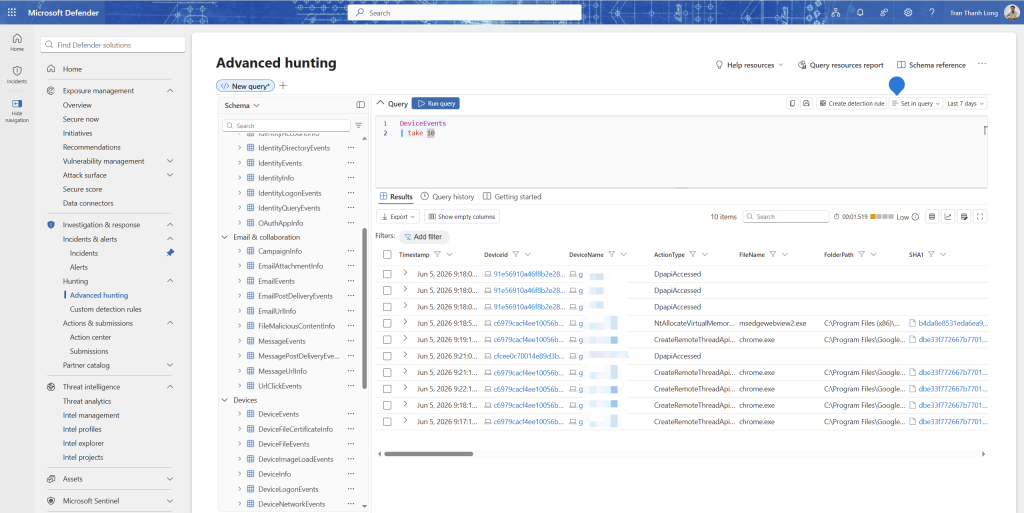
Nếu thấy kết quả, dữ liệu đang chảy vào. Nếu bảng rỗng, thiết bị chưa onboard vào MDE (xem lại bài 4).
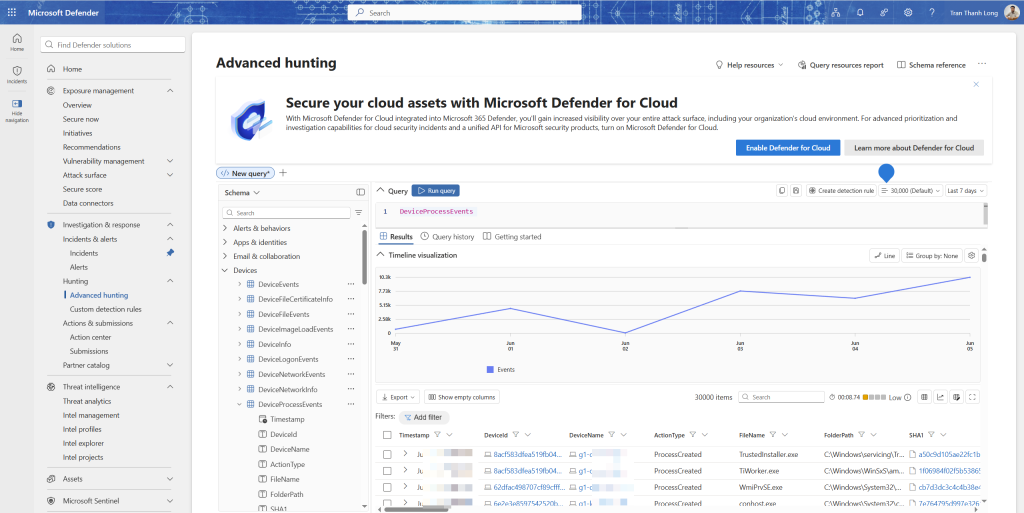
Bước 2: 6 operator KQL cần biết
where – lọc dữ liệu
DeviceProcessEvents
| where Timestamp > ago(24h)
| where FileName == "powershell.exe"
ago(24h) = 24 giờ trước. Có thể dùng ago(7d), ago(30d), v.v.
project – chọn cột cần hiển thị
DeviceProcessEvents
| where Timestamp > ago(24h)
| where FileName == "powershell.exe"
| project Timestamp, DeviceName, AccountName, ProcessCommandLine
Không có project thì query trả về tất cả 40+ cột – rất khó đọc.
summarize – tổng hợp, đếm, thống kê
DeviceNetworkEvents
| where Timestamp > ago(24h)
| summarize ConnectionCount = count() by DeviceName, RemoteIP
| sort by ConnectionCount desc
Hiển thị thiết bị nào đang kết nối nhiều nhất đến IP nào.
extend – tạo cột tính toán
DeviceProcessEvents
| where Timestamp > ago(24h)
| extend CommandLength = strlen(ProcessCommandLine)
| where CommandLength > 1000
| project Timestamp, DeviceName, CommandLength, ProcessCommandLine
Command line dài bất thường (>1000 ký tự) thường là dấu hiệu obfuscation.
join – kết hợp 2 bảng
EmailEvents
| where Timestamp > ago(7d)
| where DeliveryAction == "Delivered"
| join EmailUrlInfo on NetworkMessageId
| where UrlDomain !endswith "microsoft.com"
| project Timestamp, SenderFromAddress, RecipientEmailAddress, Url, UrlDomain
Tìm email đã được deliver có chứa link đến domain không phải Microsoft.
let – khai báo biến hoặc sub-query
let SuspiciousIPs = dynamic(["185.220.101.1", "45.142.212.100"]);
SigninLogs
| where Timestamp > ago(7d)
| where IPAddress in (SuspiciousIPs)
| project Timestamp, UserPrincipalName, IPAddress, Location, RiskLevelDuringSignIn
let giúp query dễ đọc và tái sử dụng logic.
Bước 3: Bản đồ schema – bảng nào chứa dữ liệu gì
Biết bảng nào để query là quan trọng không kém biết viết KQL.
Nhóm Endpoint (tiền tố Device)
| Bảng | Dữ liệu |
|---|---|
DeviceEvents | Mọi event trên thiết bị (general) |
DeviceProcessEvents | Process được tạo, command line đầy đủ |
DeviceNetworkEvents | Kết nối network, DNS queries |
DeviceFileEvents | File được tạo, đổi tên, xóa |
DeviceRegistryEvents | Registry được đọc/ghi |
DeviceLogonEvents | Đăng nhập vào thiết bị |
DeviceImageLoadEvents | DLL được load |
Nhóm Email (tiền tố Email)
| Bảng | Dữ liệu |
|---|---|
EmailEvents | Email delivery, sender, recipient, subject |
EmailAttachmentInfo | File đính kèm, verdict |
EmailUrlInfo | URLs trong email |
EmailPostDeliveryEvents | Actions sau khi email đã deliver (user click, ZAP…) |
Nhóm Identity
| Bảng | Dữ liệu |
|---|---|
IdentityLogonEvents | Đăng nhập (Entra ID + AD on-prem) |
IdentityQueryEvents | LDAP queries trên AD |
IdentityDirectoryEvents | Thay đổi trong AD (group membership, password reset…) |
AADSignInEventsBeta | Sign-in logs chi tiết từ Entra ID |
Nhóm Cloud Apps
| Bảng | Dữ liệu |
|---|---|
CloudAppEvents | Activities trong Microsoft 365 và SaaS apps |
AlertEvidence | Evidence liên kết với alerts |
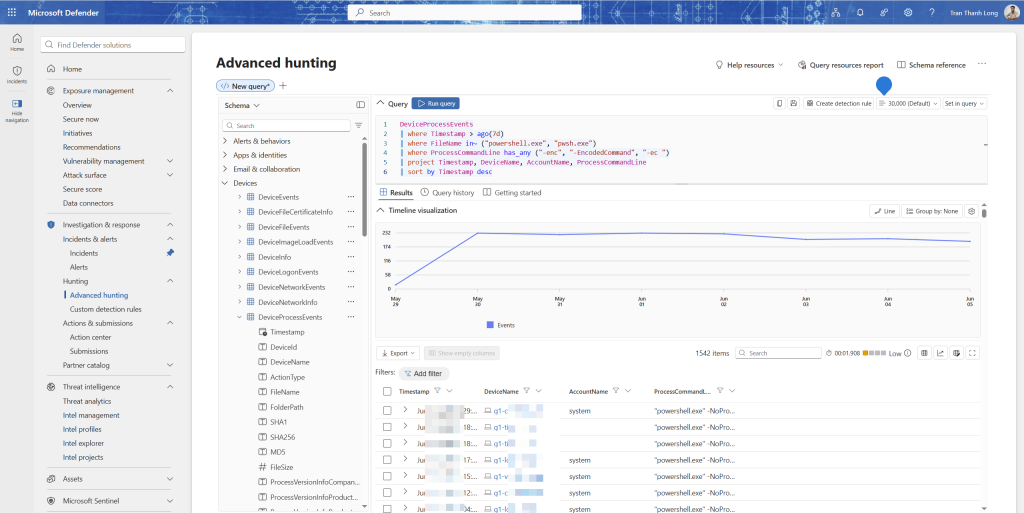
Bước 4: Hunting scenario 1 – tìm PowerShell đáng ngờ
PowerShell là công cụ yêu thích của attacker vì mạnh, có sẵn trên mọi Windows, và có thể obfuscate. Dấu hiệu đáng ngờ: command được encode bằng Base64, download từ internet, hoặc bypass execution policy.
Query 4a: tìm PowerShell với encoded command
DeviceProcessEvents
| where Timestamp > ago(7d)
| where FileName in~ ("powershell.exe", "pwsh.exe")
| where ProcessCommandLine has_any ("-enc", "-EncodedCommand", "-ec ")
| project Timestamp, DeviceName, AccountName, ProcessCommandLine
| sort by Timestamp desc
has_any kiểm tra xem chuỗi có chứa bất kỳ từ nào trong danh sách không. in~ so sánh case-insensitive.
Query 4b: tìm PowerShell download từ internet
DeviceProcessEvents
| where Timestamp > ago(7d)
| where FileName in~ ("powershell.exe", "pwsh.exe")
| where ProcessCommandLine has_any (
    "Invoke-WebRequest", "IWR", "wget", "curl",
    "DownloadFile", "DownloadString", "Net.WebClient",
    "Start-BitsTransfer"
)
| project Timestamp, DeviceName, AccountName, InitiatingProcessFileName, ProcessCommandLine
| sort by Timestamp desc
Query 4c: tìm PowerShell bypass execution policy
DeviceProcessEvents
| where Timestamp > ago(7d)
| where FileName in~ ("powershell.exe", "pwsh.exe")
| where ProcessCommandLine has_any ("-ExecutionPolicy Bypass", "-EP Bypass", "-Exec Bypass", "bypass")
| project Timestamp, DeviceName, AccountName, ProcessCommandLine
Bước 5: Hunting scenario 2 – tìm impossible travel
Impossible travel: user đăng nhập từ Việt Nam lúc 8 giờ sáng, 2 tiếng sau đăng nhập từ Mỹ. Không thể di chuyển nhanh như vậy – một trong hai đăng nhập là giả mạo.
IdentityLogonEvents
| where Timestamp > ago(7d)
| where LogonType == "Interactive" or LogonType == "RemoteInteractive"
| project Timestamp, AccountUpn, Location, IPAddress, ISP
| sort by AccountUpn, Timestamp asc
| extend PrevTimestamp = prev(Timestamp, 1),
         PrevLocation = prev(Location, 1),
         PrevIPAddress = prev(IPAddress, 1)
| where AccountUpn == prev(AccountUpn, 1)
| extend TimeDiffMinutes = datetime_diff("minute", Timestamp, PrevTimestamp)
| where TimeDiffMinutes < 120
| where Location != PrevLocation
| where isnotempty(Location) and isnotempty(PrevLocation)
| project Timestamp, AccountUpn,
          PrevLogin = PrevTimestamp, PrevLocation, PrevIPAddress,
          CurrentLogin = Timestamp, Location, IPAddress,
          TimeDiffMinutes
| sort by TimeDiffMinutes asc
Query này tìm các cặp đăng nhập của cùng một user: xảy ra trong vòng 120 phút nhưng từ 2 location khác nhau.
Bước 6: Hunting scenario 3 – tìm email phishing đã bypass Safe Links
Đôi khi email phishing vượt qua filter. Query này tìm user đã click vào URL trong email mà Safe Links đã xác định là độc hại sau đó (time-of-click vs time-of-delivery).
EmailPostDeliveryEvents
| where Timestamp > ago(7d)
| where ActionType == "UrlClicked"
| join kind=leftouter (
    EmailUrlInfo
    | where UrlVerdict != "Clean"
    | project NetworkMessageId, Url, UrlVerdict
) on NetworkMessageId
| where isnotempty(UrlVerdict)
| join kind=leftouter (
    EmailEvents
    | project NetworkMessageId, SenderFromAddress, RecipientEmailAddress, Subject
) on NetworkMessageId
| project Timestamp, RecipientEmailAddress, SenderFromAddress,
          Subject, Url, UrlVerdict
| sort by Timestamp desc
Bước 7: Hunting scenario 4 – tìm lateral movement
Lateral movement là khi attacker đã vào được một máy và đang di chuyển sang máy khác trong mạng. Dấu hiệu phổ biến: dùng PsExec, WMI, hoặc remote PowerShell để chạy lệnh trên máy khác.
Query 7a: tìm PsExec activity
DeviceProcessEvents
| where Timestamp > ago(7d)
| where FileName =~ "psexec.exe" or FileName =~ "psexesvc.exe"
    or ProcessCommandLine has "psexec"
| project Timestamp, DeviceName, AccountName,
          InitiatingProcessFileName, ProcessCommandLine
| sort by Timestamp desc
Query 7b: tìm WMI remote execution
DeviceProcessEvents
| where Timestamp > ago(7d)
| where InitiatingProcessFileName =~ "wmiprvse.exe"
| where FileName !in~ ("WmiPrvSE.exe", "unsecapp.exe", "wsmprovhost.exe")
| project Timestamp, DeviceName, AccountName,
          InitiatingProcessFileName, FileName, ProcessCommandLine
| sort by Timestamp desc
Query 7c: tìm remote scheduled task creation
DeviceProcessEvents
| where Timestamp > ago(7d)
| where FileName =~ "schtasks.exe"
| where ProcessCommandLine has "/create" and ProcessCommandLine has "\\"
| project Timestamp, DeviceName, AccountName, ProcessCommandLine
| sort by Timestamp desc
Bước 8: Hunting scenario 5 – tìm mass download từ SharePoint
Dấu hiệu data exfiltration: user đột nhiên download rất nhiều file trong thời gian ngắn.
CloudAppEvents
| where Timestamp > ago(7d)
| where ActionType == "FileDownloaded"
| where Application == "Microsoft SharePoint Online"
| summarize DownloadCount = count(),
            FileList = make_set(ObjectName, 20),
            FirstDownload = min(Timestamp),
            LastDownload = max(Timestamp)
    by AccountUpn, IPAddress, bin(Timestamp, 1h)
| where DownloadCount > 50
| extend Duration = datetime_diff("minute", LastDownload, FirstDownload)
| sort by DownloadCount desc
Query này tìm user download hơn 50 file trong vòng 1 giờ. make_set tạo danh sách tên file (tối đa 20 cái) để xem họ đang download gì.
Bước 9: Kết hợp nhiều bảng – tìm compromise chain hoàn chỉnh
Query nâng cao này kết hợp email + endpoint để tìm user nhận phishing email và sau đó có process đáng ngờ chạy trên máy.
// Bước 1: tìm email phishing đã deliver trong 7 ngày
let PhishingRecipients =
    EmailEvents
    | where Timestamp > ago(7d)
    | where ThreatTypes has "Phish"
    | where DeliveryAction == "Delivered"
    | project RecipientEmailAddress, NetworkMessageId, Subject, SenderFromAddress;

// Bước 2: tìm process đáng ngờ trên các máy của user đó
DeviceProcessEvents
| where Timestamp > ago(7d)
| where FileName in~ ("powershell.exe", "wscript.exe", "cscript.exe", "mshta.exe")
| project Timestamp, DeviceName, AccountName,
          FileName, ProcessCommandLine
| join kind=inner (
    PhishingRecipients
    | extend AccountName = tostring(split(RecipientEmailAddress, "@")[0])
) on AccountName
| project Timestamp, DeviceName, AccountName,
          RecipientEmailAddress, Subject, SenderFromAddress,
          FileName, ProcessCommandLine
| sort by Timestamp asc
Bước 10: Lưu query và chia sẻ
Lưu query để dùng lại
- Sau khi viết query hoạt động tốt → bấm Save
- Đặt tên và description rõ ràng
- Chọn Shared queries nếu muốn chia sẻ với team, hoặc My queries nếu chỉ dùng cá nhân
[screenshot: dialog Save query, điền tên và chọn Shared queries]
Chuyển query thành custom detection rule
Nếu muốn query chạy tự động và tạo alert khi có kết quả:
- Viết và test query trong Advanced Hunting trước
- Bấm Create detection rule
- Điền:
- Alert title:
Suspicious PowerShell with encoded command - Severity: Medium
- Category: Execution (MITRE ATT&CK T1059.001)
- MITRE ATT&CK technique: T1059.001 — Command and Scripting Interpreter: PowerShell
- Alert title:
- Actions: Create alert, (tùy chọn) Isolate device, Run antivirus scan
- Run frequency: Every hour
Bước 11: Go Hunt – hunting từ một entity cụ thể
Khi đang điều tra một incident và muốn xem thêm context về một entity cụ thể (user, device, IP, file), dùng Go Hunt thay vì tự viết query từ đầu.
- Trong incident hoặc alert, click vào bất kỳ entity nào
- Bấm Go Hunt (hoặc biểu tượng hunting)
- Defender tự generate query phù hợp với entity đó và mở trong Advanced Hunting
[screenshot: entity panel với nút Go Hunt, sau đó Advanced Hunting mở với query được pre-fill]
Ví dụ: click vào IP address đáng ngờ → Go Hunt → query tự động tìm tất cả connections đến/từ IP đó, process nào initiate connection, user nào liên quan.
Bảng tổng hợp: các query nên bookmark
| Scenario | Bảng chính | Indicator |
|---|---|---|
| PowerShell encoded | DeviceProcessEvents | -enc, -EncodedCommand |
| PowerShell download | DeviceProcessEvents | Invoke-WebRequest, DownloadString |
| Impossible travel | IdentityLogonEvents | Cùng user, 2 location, <2h |
| Phishing clicked | EmailPostDeliveryEvents | UrlClicked + UrlVerdict |
| Lateral movement PsExec | DeviceProcessEvents | psexec.exe |
| Lateral movement WMI | DeviceProcessEvents | wmiprvse.exe as parent |
| Mass download | CloudAppEvents | FileDownloaded > 50/giờ |
| New forwarding rule | CloudAppEvents | New-InboxRule có ForwardTo |
| New Global Admin | IdentityDirectoryEvents | Thêm vào Global Administrator role |
Tổng kết những gì đã làm
Sau bài này, bạn đã có:
- Nền tảng KQL – 6 operator đủ để viết 80% queries thực tế
- Bản đồ schema – biết bảng nào chứa dữ liệu gì
- 5 hunting scenarios có query sẵn: PowerShell đáng ngờ, impossible travel, email phishing bypass, lateral movement, mass download
- Query kết hợp nhiều bảng để tìm compromise chain
- Custom detection rules từ queries đã viết
- Go Hunt để hunting nhanh từ entity trong incident
Tài liệu tham khảo
- Advanced hunting overview
- KQL quick reference
- Advanced hunting schema reference
- Microsoft 365 Defender hunting queries
- MITRE ATT&CK framework
Bài viết có gì chưa rõ hoặc bạn gặp lỗi ở bước nào, cứ để lại comment bên dưới – mình sẽ cập nhật bài.
Long Trần | khongkho.com